

Showing posts with label teacher tip. Show all posts
Showing posts with label teacher tip. Show all posts
10 Fast Finisher Activities

Teaching & Reviewing Essential Survival Signs & Symbols

We encounter special signs, symbols, and directions in every area of our lives. They provide us with information and tell us what we can and cannot do. Knowing what they mean is vital. Knowing them is even more essential for students who are trying to expand their knowledge outside the classroom into the real world. We've put together some fun, hands-on activities to help you teach and review the essential signs and symbols with your students.
Setting & Attaining Goals with your Students

These Activities are Absurd!

The funny thing about absurdities is that they entertain and build thinking skills. Absurdities are a key component of humor. Because they are fun, absurd activities can turn a reluctant learner into an eager student. And we all need a little more humor in our lives!
But absurdities have a serious side too! They are an effective teaching tool for problem solving and decision making. Students become more aware of the need to analyze the logic in something and apply common sense reasoning to communication. As students do this, their skills in making judgments and finding solutions increases.
These fun, clever, and absurd activities will improve students' critical thinking skills!
Save Yourself from Repeating Yourself

1. Please, get out a pen and paper.
If you’re giving big instructions explaining the giant essay that students must complete by Friday, with 631 words, double-spaced, in curlz font on the topic of deforestation (please don’t do this to your kiddos), you may want to make sure that they are writing these details down.
2. What page did you say?
Designate a spot on your board for important information that your students can always know to refer to. For example, if you are asking them to complete the questions on page 85 of their math textbook, write that on the board. This will help avoid the “What page did you say?” question.
Help Students Get Better at “Getting It”

We’ve put together the following activities that will helps students progressively improve their abstract thinking skills and their ability to “get it.”
Where are we going?
This activity will have students reading simple symbols in a key and answering questions about a map. You can get lots of questions out of this one map that will improve comprehension skills. Simply display the map on your whiteboard or print it out so each student gets his or her own map. Then ask students to use the symbols to answer the questions below.
Activities for After You’ve Read a Mystery

Part 3: Activities for After You’ve Read a Mystery
Wanted Sign
Have students create a wanted sign for the villain of their whodunit. Students can draw the bad guy and then beneath the picture write who, what, where, when, why about the criminal.
Follow the Clues
As students read, have students write down the clues and the paragraph or page number they are found on. Then, once students have finished reading the mystery, have students go back to their notes and label each clue: useful or red herring.
5 Easy Ways to Show Your Students the Love

- Take a cue from the recent social media craze that Kyle Schwartz started by asking her third graders to jot down “What I Wish My Teacher Knew”. This simple lesson plan not only builds your students’ sense of community, but it also shows your students that you care and are there to listen to their needs. Read the full article about Kyle Schwartz’s lesson here.
- Keep a birthday calendar for your students and celebrate birthdays with a special message on the board.
Tip: Don’t forget about your summer birthdays. Take note of those in the last weeks of the school year.
- Send this note home to parents asking them to write their child a letter telling them just how proud they are. If it’s in your budget, include an envelope and the paper for them to write on. You can either give out the parent letters all at once or randomly on days you feel some students need a little pick-me-up, like right before a big test.
Tip: You could even have parents do this at the beginning of the school year on Meet the Teacher Night so you don’t have to send anything home in hopes that it makes it back to you.
- If you have students who play in a school sport or are in the school’s band, go to their events and show your support. Students will feel extra special knowing you are there cheering them on.
Tip: Announce student victories to the class. "Let's give Austin a round of applause. His baseball team won their game this weekend."
- Sometimes it may feel like you are only sending negative notes home. Be sure to balance out the notes. If you see a student excel, succeed, or do a good deed, send a positive note home. They deserve to know you noticed, and their parents will be happy to see some positive feedback.
Click to Tweet: I love my students! Here are 5 easy ways to show your students the love from @remediapub
How do you show your students the love?
5 Crafts & Experiments using Recycled Soda Bottles
We know you save every empty shoebox, paper towel roll, and soda bottle just in case the right class project or craft comes along. So let us help you put those hoarded 2-liter soda bottles to work!
Start by removing the labels and the sticky residue left behind. The trick is soaking the bottles in warm water, which will get most of the label off, and then using either white vinegar or peanut butter (yes, peanut butter—smooth, not chunky) to remove the sticky residue.
 Worm Farm
You will need a 2-liter bottle, 16-ounce water bottle (empty), sand, dirt, rocks, worms, tape, and black construction paper. Cut the tops off of the two bottles. Be sure to save the top of the 2-liter bottle. Put about one inch of rocks with a little dirt in the bottom of the 2-liter bottle, then place the smaller bottle inside the larger bottle, and begin layering sand and dirt around the smaller bottle. Once you have the dirt filled most of the way to the top, add three to five worms, and tape the 2-liter bottle’s lid back on top (remove the cap). Now, you’re ready to watch the magic happen. Worms work best in the dark, so cover the bottle with the black construction paper and check back in to see their progress. Encourage students to keep a journal to record what they see and discover.
Punctured Plastic Bottle Experiment
This experiment demonstrates how air pressure controls the flow of water. To demonstrate this, you will poke a hole near the bottom of a 2-liter bottle, cover the hole with masking tape, and then fill the bottle with water and put the cap on the bottle. Click here to download this experiment and activity from our Hands-On Experiments books.
Start by removing the labels and the sticky residue left behind. The trick is soaking the bottles in warm water, which will get most of the label off, and then using either white vinegar or peanut butter (yes, peanut butter—smooth, not chunky) to remove the sticky residue.
Worm Farm You will need a 2-liter bottle, 16-ounce water bottle (empty), sand, dirt, rocks, worms, tape, and black construction paper. Cut the tops off of the two bottles. Be sure to save the top of the 2-liter bottle. Put about one inch of rocks with a little dirt in the bottom of the 2-liter bottle, then place the smaller bottle inside the larger bottle, and begin layering sand and dirt around the smaller bottle. Once you have the dirt filled most of the way to the top, add three to five worms, and tape the 2-liter bottle’s lid back on top (remove the cap). Now, you’re ready to watch the magic happen. Worms work best in the dark, so cover the bottle with the black construction paper and check back in to see their progress. Encourage students to keep a journal to record what they see and discover.
Punctured Plastic Bottle Experiment
This experiment demonstrates how air pressure controls the flow of water. To demonstrate this, you will poke a hole near the bottom of a 2-liter bottle, cover the hole with masking tape, and then fill the bottle with water and put the cap on the bottle. Click here to download this experiment and activity from our Hands-On Experiments books.
Solve Math Word Problems in 6 Easy-to-Follow Steps

Many students have difficulty mastering word problems. We have a solution that helps students break apart a word problem into six easy-to-follow steps. In following these steps, students will learn to focus on the information and sequence that is helpful to solving the problem.
Use this template <free download> to make following these steps even easier.

1. Underline the Facts
Students should carefully read the problem and then determine which facts give them the information they need to solve the problem.
2. Highlight the Question
Focusing on the question will give clues as to what operation should be used to solve the problem.
3. Circle the Operation
Focusing on this step allows students to use the information gathered in the first two steps to make their decision about the operation and then move on to the next step.Students who struggle with word problems may specifically struggle with the words that indicate the operation. Work with students to recognize these words and what operation they indicate: in all (add), how many more (subtract), how many left (subtract), etc..

“subtract”.
4. Write the Equation
This important step is a result of determining the operation and then using the information from the facts. Writing the equation says: “I know how to do this problem.”
5. Solve the Problem
This is the computation part of the process. Students will solve for the answer.
6. Write Your Answer in a Sentence (Does it make sense?)
Writing the answer in a sentence helps reinforce the problem-solving process. Asking students to think about whether or not the answer “makes sense” helps them check the answer and see it in the context of the problem.
Following these steps will help students master one-step word problems so that when extra information appears in their word problems, they can differentiate the important versus the unimportant information.
Tip: Have students use different colored crayons or markers for two-step word problems. This will help each operation stand out. Plus students will love getting to use markers in math class!
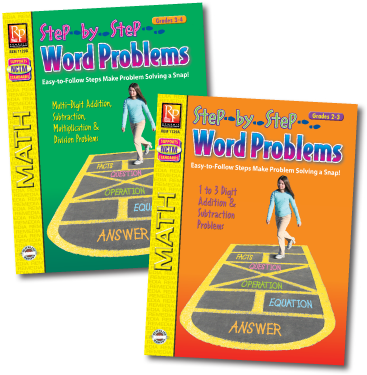
Check out our two Step-by-Step Word Problems activity books that are packed with practice activities using these 6 easy-to-follow steps. The books feature three to four levels of practice. As the levels progress, students are challenged to apply their skills. Word problems include multi-digit addition, subtraction, multiplication, and division with and without regrouping.
Classroom Activities for All of April

3 April Fools Jokes to Play on Your Students
- Give your students this "pop quiz". Use our April Fools pop quiz <free download>. Tell your students, "Be sure to read all of the questions before beginning, but the first person to complete the quiz with all of the answers correct will win a candy bar!" The questions on this April Fools quiz are obscure, but the last question instructs the students to not answer any of the questions, just write their name and turn in the quiz. Success will be based on how well your students follow directions.
- At the end of the school day say to your students, "I'm very disappointed in how few of you turned in your essay that was due today! You may make up the assignment by writing five additional pages on the original topic and turn the entire essay in to me, tomorrow." Enjoy the students' reactions and choose how far you take it from there before you yell "April Fools!"
- Write every students' name on the board with random information next to each name, for example dates, letters (A-F), vocabulary words, and/or numbers. Do not explain anything to the class. If a student asks what it's about, simply say, "I'll tell you after lunch." Watch your students squirm and sweat all morning in anticipation. At lunch remove the names and write "April Fools!" on the board.
Earth Day Activities
Trash-less Tuesdays
Try having a "Trashless Tuesday" each week of the month of April. Do this by encouraging your students to bring reusable containers to lunch on Tuesdays and to avoid bringing anything that needs to be thrown away (i.e. no prepackaged food) to help cutback on waste.
Two Recycling Activities
For the next two activities have each student bring in one clean, recyclable item to class: glass, plastic, paper, or metal. You should also bring in a few items for those students who will forget, and to add to the mix.
Use the students' items to work on graphing skills. Either give each student a blank graph <free download> or put one on the board to complete. Ask students who brought a glass item to raise their hands and count them; add that number to the graph. Do the same for the other categories. Now have students create a bar graph, line graph, or pie chart using the information you've gathered.
Now, it's time to recycle. Turn recycling into a classifying game. Have students trade their item with another student in the class, as they may already know in which category their item belongs. Put four boxes at the front of the class labeled: glass, plastic, paper, and metal. Then, have students take turns putting items in the correct receptacle.
Activity Book Suggestions
More Recycling Tips for Your Classroom
National Poetry Month
For some quick tips on where to get started with poetry in your classroom, use our Teacher's Guide to poetry <free download> in the classroom pulled from our Writing Basics Series: Writing Poems, which gives students lots of practice writing traditional forms of poetry such as couplets, quatrains, and haikus as well as the non-traditional free-verse form.
Read Poetry
Read a poem to your students every day of the month. After each poem, ask students:
- What do you think the poem is about?
- Where did the poem take place?
- Who is the speaker in the poem?
- How did that poem make you feel?
- Why do you think the poet wrote the poem?
Write a Ransom Note Poem
Have students write a poem (the shorter the better with this activity). Then let them rummage through magazines to find the words from their poem. Encourage students to make the more important words or words that need more emphasis to be larger. Then, have them cut and paste the words and letters onto a piece of construction paper. It's a colorful way to display your students' poetry.
3 Kid-friendly Poets Include:
Free Download
Smilies & Metaphors activities from our Writing Basics Series: Writing Poems
Test-Prep Tips for Teachers & Students

Test Giving Tips
Take some of the anxiety and anticipation out of test day by making your classroom a test-friendly environment.
• Set the mood by playing calming music as students come into class.
• Give tests at the beginning of the day when students' attentions are still alert and focused.
• Give your students each a magic pencil (no. 2 of course)--they come in fun colors and designs. Or get creative and have students decorate their no. 2 pencil with glitter and stickers the day before the test to help them relieve some pre-test stress.
• Have extra sharpened pencils available in case of breaks so students aren't sharpening pencils during the test.
• Stock your classroom with plenty of books for students who finish tests quickly.
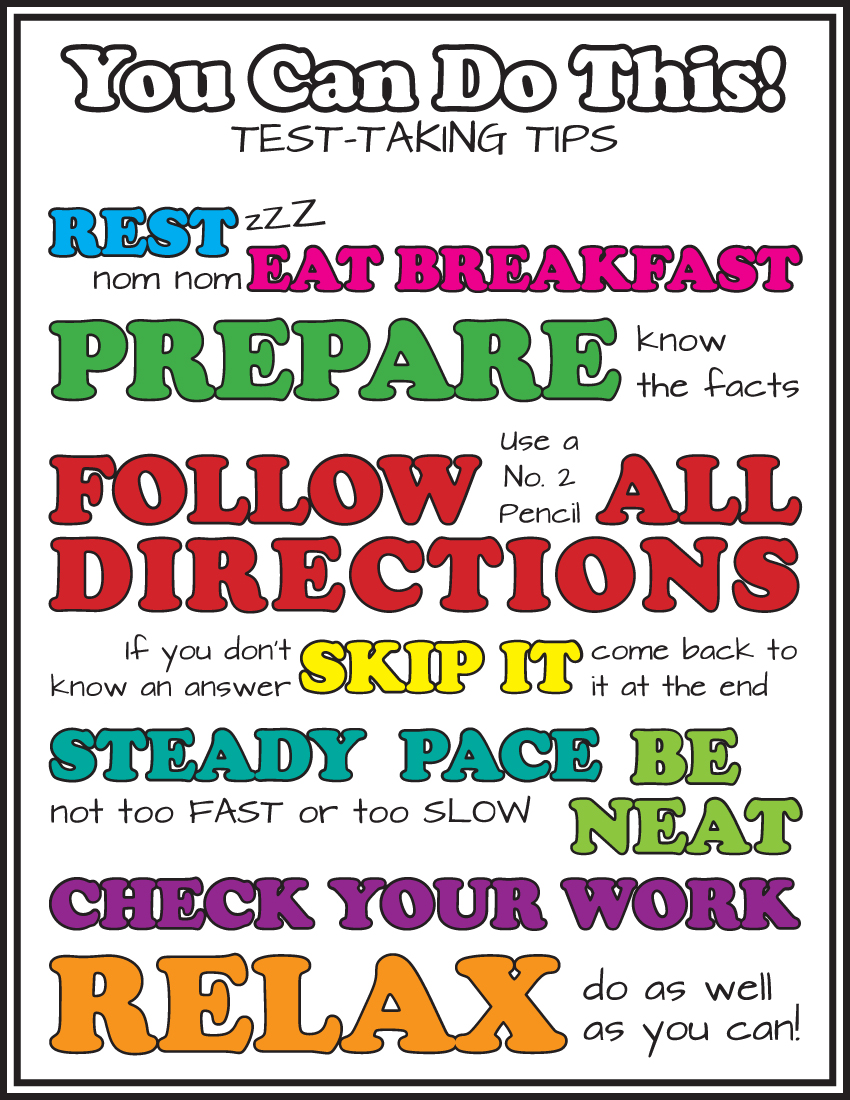 |
| Click here to download this poster. |
• Have student turn finished tests in to the back of the classroom. This can be less distracting for students still taking the test and lessen any anxiety they may have for not finishing as quickly as their peers.
• Get the wiggles out between tests: jumping jacks, stretching, pencil sharpening, bathroom break, etc.
• Celebrate when testing is finished! Get party ideas from our Party Time! Pinterest board for great ideas.
Need some more help?
Check out Remedia's materials geared towards improving test-taking skills.
Test Taking Tips
Download the FREE You can do it! Test-Taking Tips poster and bonus activity.
How to Improve Students' Critical Thinking Skills

Improve high-level, critical thinking skills and you're sure to improve reading comprehension, problem solving, writing skills, and more! We’ve gathered five important higher-level thinking skills, defined the skill, and suggested a way for you to help improve that skill. These tips are a terrific way to give your students the tools they need for success in school as well as in their daily lives!
5 Lessons of the Heart

Getting to Know the Heart
Familiarize students with the parts of the heart with this free labeling activity from our Labeling for Comprehension Series. Students will read a short description of the heart, and then demonstrate their understanding by labeling the diagram. Now, they are ready to get their blood flowing with the next two activities.
A Blood-Pumping Graphing Activity
Integrate math, health, and heart-healthy science with this blood-pumping activity. Students will graph their heart rates while doing different activities.
1. Ask students, “Did you know that your heart is a muscle? In fact, it is the only hollow muscle in your body. Like all the muscles in your body, your heart stays strong when it exercises. Let’s see how exercise makes your heart work and keep strong.”
2. Have students find their pulse while sitting at their desks (resting heart rate). Have each student gently press their forefingers to their wrist, near the base of the thumb. Have them count the pulses while you keep time for 15-seconds. Then each student should multiply their count by four to get the beats-per-minute. Have students write this number in this chart (free download).
3. Complete the chart together as a class. After each activity, have students take their pulse. You’ll be in charge of the clock, tracking the intervals, and making sure students stay on-task. When you are done, have students create a bar graph or line graph to show how their heart rate differed for each activity.
4. Explain to students that blood is a special “belt” that brings oxygen to the muscles and carries the bad away, and you want your heart to be in its best shape to do this well.
A Field Trip Through the Heart
Good News! This field trip does not require a permission slip. Students will take a trip through the heart right in your classroom.
- With tape, draw a large diagram (click here to download) of the heart on our classroom floor. This diagram includes a station for the lungs and body cells.
- Label the chambers of the heart, the lungs, the body cells, and all blood vessels accordingly.
- Place large blue circle cutouts in the body cells and large red circle cutouts in the lungs.
- Have a small group of students be the “blood” moving along the route through each station like blood flowing through the heart.
- Have two students be the “lungs” in the lung station.
- Have a few students act as the “body cells” in the body cells station.
- Narrate what the blood is doing as the students go through each stop.
- Explain what blood vessel they must take.
- As students reach the body cells station, have students exchange their red circles (blood cells carrying oxygen) for blue circles (blood cells carrying carbon dioxide).
- As students pass through the lungs, have them exchange their blue cells for red cells, which illustrates the diffusion of oxygen into the blood. Point out that blood vessels carrying blood away from the heart are arteries, and usually carry red blood. Blood vessels carrying blood towards the heart are veins, and usually carry blue blood.
- Also point out that the right side of the heart handles blue blood and the left side of the heart handles red blood.
Use these free worksheets <free download> before students take a trip through the heart to give a little background knowledge of the heart and cardiovascular system. These worksheets come from our The Human Body: Digestive, Circulatory, Reproductive, & Excretory Systems book.
Secret Valentine Exchange
Finish your heart-throbbing unit with a Secret Valentine Exchange. This activity is still science-focused while incorporating language skills.
1. Put every student’s name in a bag, and have each student draw a name from the bag.
2. Have students color and decorate this free heart template using red and blue crayons, construction paper, or magazine clippings to properly indicate where the red and blue blood cells flow.
3. On the back of each heart ask to students “pour their hearts out” to their Secret Valentine using heart-themed idioms or proverbs, such as: heart pumping, change of heart, heart misses a beat, heart bleeds, with a heavy heart, eat your heart out, from the bottom of my heart…etc.
Use this opportunity to encourage students to work on their handwriting, poetry, and/or creative writing skills. On V-day, have students share their heart (pun intended) with the whole class and reveal who and why they think their Secret Valentine has a heart of gold.
Freebies from the American Heart Association
Check out The American Heart Association who makes a variety of educational lessons, posters, activities, and other great freebies to support your heart lessons.
7 Get-Up-&-Move Math Activities

 Bowling Math
Get an inexpensive bowling kit from the toy section and set up a lane or two in your classroom. On the bottom of each pin write numbers (depending on your student's level make the numbers as small or large as you'd like). Have students take turns rolling the ball down to the pins. After one student rolls the ball down to the pins, have that student walk, lunge, or skip down to the pins. Have that student add up the numbers on the bottom of their pins--that's their score for that round. If you'd rather not keep score, just have students work the math problem. They can either add, subtract, or multiply all of the numbers or just the two largest numbers.
Active Stations
As students make their way through your normal math stations, have them do lunges, crab walking, or wheel barrels to get to the next station.
Bean Bag Toss
Use these simple instructions (from Dirt & Boogers Blog) to make your own Bean Bag Toss easily and with very few materials. Adjust the design with a few extra holes to make this game educational. Simply cut several holes into the box and label each hole with a number. Give students a math equation and have them toss the bean bag into the hole with the correct answer. Or assign word problems to each number. Whichever hole the bean bag lands in, that is the word problem the student must answer.
5 Gift-Themed Activities

Gift Stations ~ Math
Fill several different size boxes with random dollar store gifts and wrap them or use the dollar store gift boxes--no wrapping necessary. Then, put the gifts at different gift stations: one station for measuring, one for weighing, and one for word problems. Split students into groups and rotate them through each gift station. Have students work together to answer the questions you’ve left at each gift station.
Word Problems Gift Station: Tape a word problem to the bottom of each gift. Ask students solve one or all of the problems on each gift. Or to further challenge your students, ask them to determine which gift is the largest or heaviest, and then have them only answer the word problem on the bottom of that gift.
Measurement Gift Station: Ask students to measure each box’s width, height, length and determine which is the largest, smallest, and tallest gift.
Weight Gift Station: Do the same as the Measurement Stations with weight related questions.
Celebrity Gift ~ Writing
Because gift giving is so special, it should take a lot of thought and planning. Ask students to think about what they might give to their favorite celebrity or character from a book. They can pick the celebrity or have students pick one person from list. Then have write about the gift they would give. Ask student to describe the gift and why they chose it for that person.
Celebrity Suggestions: Santa Clause, the President, Walter Payton, J.K. Rowling, Miley Cyrus, One Direction, Bart Simpson, Justin Timberlake, Katniss Everdeen (The Hunger Games).
For more inspiration and mini biographies to help students know what to choose as a gift, have students read any one of our Celebrity Readers stories.
Encouraging Grit & Perseverance in Your Students
 There is a lot of buzz about teaching students "grit." The word is gaining excitement and controversy, and no matter where you stand on the debate, it's hard to deny that encouraging students to have grit and perseverance can't be a bad thing. The idea of "grit" is like when if you fall off your bike, you pick yourself up, and get back on the bike. If we can instill this value in students who struggle in math, reading, or any other subject, just think how far they could go.
If you're interested in helping your students gain some grit and perseverance, you're going to have to put in some effort. Sometimes through the pounding over the head method of teaching and sometimes with a bit more subtlety. Because unfortunately, you can't teach these traits in one single lesson plan with a quiz and letter grade at the end. So we have compiled some suggestions on how to instill some tenacity in your students.
Verbal Encouragement
Instead of general praise (i.e. you're so smart), recognize a student's performance based on their effort. Try saying, "Great job on that test! The time you spent after class reviewing really paid off." Students need to understand how their efforts effect their outcome, whether it be success or failure.
Resist the Urge to Offer Hints
Letting students struggle a little to answer a question will be a hard task for both you and your students. However doing this not only teaches them that it's okay to not always know the answer, as it's an opportunity to learn, but it also lets them become comfortable with the struggle. Just because it's not easy, isn't a reason to quit and give up.
Pilgrim Pen Pals

Instructions: Imagine you were a passenger on the Mayflower. Now that you are in America and have started making a new home, write a letter to friend back in England. Tell about something that has happened since you left nine months ago.Meet the Common Core State Standards with this Activity
Tip: Diversify this lesson by having some students write from a Native American’s point of view. These students can write letters or diary entries to show their understanding, which will give a complete perspective of the events during this time period.
 |
| Enlarge |
- Students should begin by reading informational text to gain knowledge about this time period. (CC.R.I.10)
- Have students use the parts of a friendly letter correctly, including: date, greeting, body, closing, and signature. (CC.L.2)
- Ask students to write their letters as narratives. They should develop imaginary, yet realistic, experiences using effective technique, descriptive details, and clear event sequences. (CC.W.2 and CC.W.3)
- Give students time to research, reflect, and revise their letters. (CC.W.10)
- Require students to do additional research. Have them draw evidence from informational texts to support analysis and reflection while writing their letters. (CC.W.7-9)
- Students should explain events, ideas, or concepts, including what happened and why, based on specific information they find. (CC.R.I.3)
- Help students use technology to type and publish their letters. (CC.W.6)
- Students can type and print their letters, then display them on a bulletin board display (see Bulletin Board details below).
- Students can create a Fakebook account for their fictitious pilgrim. Learn more about Fakebook.
- Students can write a text message conversation between two pilgrims, a pilgrim and a Native American, or a pilgrim and his friend in England using this SMS Generator.
Bulletin Board: Pilgrim Pen PalsStudents will have a blast writing Pilgrim Pen Pal letters & I love meeting the standards! via @remediapub { Tweet This }


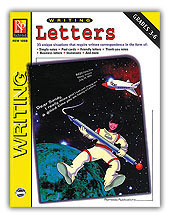
We've got you covered! Our Writing Basics Series has 8 books to help you improve one writing skill at a time. Including our Writing Letters, which is filled with lessons that teach skills needed to write business, invitational, thank you, and friendly letters.
Candy Corn Activities

Pump Up Your Pumpkin Lessons this October

You will need:
- Fresh/raw pumpkin seeds
- Cooked or store-bought pumpkin seeds
- 4 shoe boxes with lids or empty tissue boxes
- Scissors (to cut holes in boxes, not necessary if you use tissue boxes)
- Tape (to keeps lids closed, not necessary if you use tissue boxes)
- Blind fold or bandanna
- Put fresh/raw pumpkin seeds in 3 of the 4 boxes and label them:
Touch – Cut a hand-sized hole in this box. Have the children put their hands in the box and feel the slimy/wet seeds
Sound – No holes necessary on this box. Tape the lid onto this box extra tight. Instruct the students to rattle and shake the box.
Taste – Add cooked or store-bought seeds to this box. Cut a hand-sized hole in the box. Blind fold students and hand them a pumpkin seed to eat (know your students’ allergies before allowing them to participate in this box).
Sight – for a unique and fun challenge, skip sight. Students will all get to use sight in the next activity.
Subscribe to:
Posts (Atom)